
There is a Victorian fayre in Wrexham on December 11th, which hopefully will be a bit of an antidote to the new shopping centre near the town centre. I will probably go - haven't managed to fit in any Victorian events this year - and wear the bonnet I made last year, for the Ulverston Dickensian Festival, where this photo was taken (yes, I blinked). A touch of the ol' sepia tint does wonders to reduce the impact of modern life in a street scene!
We usually do slightly later Victoriana (1870s - 80s), so I needed a way to do a fairly quick revamp of existing costumes to more of an 1850s look. The bonnet is the thing that really changes the sihouette, so I decided to focus on good bonnets and use two cloaks to cover up most of the rest of the costume. Since we would be outside most of the time, this seemed the best approach. After considering drafting my own bonnet pattern, as I do with all my Victorian dress patterns, I decided to cop out and used a Simplicity bonnet pattern as my starting point. I bought the milliners wire and crimps from the USA but bought the buckram over here, so it could be sent without folding. Nothing available locally, so had to buy everything online.
To start, I traced the pattern pieces so I didn't have to cut the original pattern. I used these to cut the buckram out.

Hand sewing the milliners' wire to the buckram form with blanket stitch & buttonhole thread, so it didn't break - the buckram is marked with a blue permanent marker, not a fade out fabric marker.

 I spent awhile figuring out a way of machining parts of the bonnet but decided that making the whole thing by hand (no glue guns either) was the easiest way - and the most authentic. Since I was going to the festival with my friend from art college days, Miggy (right in top photo), I needed two bonnets. Velvet and velveteen scraps left over from costuming came in useful, plus a few lengths of silk, ribbon and other trims. Other than the pattern, buckram and wire, I made them completely from my fabric & trim stash.
Pinning the crown panel to the russet velvet bonnet. I sewed it to the buckram with large herringbone stitches that would be hidden later. I decided to pipe the crown edge next to help neaten and sharpen the finished shape.
 The outer fabric seamed and tacked in position, with the piping visible around the top edge. The fabric is partly turned under the edge of the brim. I can't remember if I backed the velvet with iron-on interfacing or not, because it was thick enough to disguise the wire and the buckram weave.
 Piping around the brim. The piping cord has a two tone twist effect.
 The "bavolet" or frill at the back of the bonnet does serve the function of helping to cushion the edge of the bonnet against your neck, although the Victorians regarded them as a modesty feature - in the 1840s and 50s anyway. I used a doubled piece of silk dupion, so I didn't have to hem the bottom edge.
 I used an extra special piece of black ribbon, with wonderful damask and chenille details, for the band on this bonnet, along with double faced satin ribbon with black and brown sides for the bonnet ties. These came from Liberty in the mid 1990s. The black ribbon was so expensive, I only bought enough to trim dress cuffs! It is stab stitched through the velvet and buckram.
 The brim is also trimmed with white pont de venise lace, tea dyed for a softer colour, partly to hide the edge of the piping. I decided to add the bows at each side now, so I could hide the stitching under the lining. The black/brown ribbon was wired - useful for the bows on the side but I had to draw the wires out to be able to use it for the bonnet ties.
 I tea dyed a length of wider cotton lace for the inside of the brim and sewed it to the lining before inserting the lining into the bonnet. Then I sewed the circular back of the lining to the main part.
 The lining was then slip stitched around the edge of the brim. A few stitches anchor the back of the lining into the back of the bonnet, so it doesn't come forward when I wear it.
 The ties were sewn in place tucked under the side bows.
 Finished!
 I decided to go for a more festive look with the second bonnet's colour scheme. The bottle green bonnet is made from velveteen, so I used an iron-on interfacing to help disguise any bumps in the bonnet form. The black chenille braid, slotted through with red ribbon, came from a local clothing manufacturer when they shut down their factory. I always knew it would come in for something! This time it was easier to apply the braid flat before adding the bonnet fabric to the form. I marked the position from the paper pattern with tacked lines.

 The crown was pinned and sewn in place -
 - before I eased the bonnet fabric over the form and stitched it to the crown.
 The velveteen was smoothed over the bonnet form.
 I added plain black piping around the brim.
 I had just enough of a plainer black chenille braid to edge around the bonnet brim. The chenille gives it a cosy touch for winter.
 This time I used black lace for the outer layer of the bavolet - adding a green shot Thai silk layer underneath, doubled again (sorry last photo is a bit out of focus - I had the camera in one hand and the bonnet in the other).

 I lined this bonnet with a piece of plum coloured twill silk. The colour combination is quite seasonal.
 The red satin ribbon ties and trims were from an Abakhan (mill shop) bargain bag!

The finished bonnet with a festive but slightly Goth look!

The bonnet pattern wasn't too difficult to use, although I didn't follow the instructions very closely. I think I will use the smaller size pattern next time - these were made on the medium size pattern (it wasn't too clear about how the bonnet sizes related to hat sizes). It is hard sewing and you have to be tough with the buckram. If you can find a small size curved needle it would help a great deal, because the wire edges make the bonnet very rigid right from the start and it can't be bent onto the needle. I would also like to make a ruched brim lining. It would have looked good on the green bonnet, but I didn't have enough time to spend on hand ruching and machine stitching would have shown there - not good for something that's supposed to predate the mass use of sewing machines.
This is how they look in colour when worn (below). The biggest problem with trying to photograph someone wearing a bonnet is you can't get the bonnet and the wearer in one shot - straight on, all you see is the inside of the brim, side view hides the wearer. We tried to do natural ringlets (i.e. no false hair) but they didn't take, so I ended up with the Dickensian character frizzy look and Miggy had "Victorian barmaid" - long loose curls. Compared with even the largest of my Victorian hats, wearing the bonnet is like having blinkers and ear muffs on at the same time!
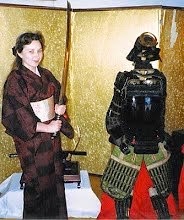
This is how I wanted the top photo framed - without cutting out the horses or including too much passing traffic.

The glum Victorian look -

UPDATE - 8th March 2012 - As I don't do early Victorian re-enactment, I'm thinking about selling these bonnets. The green one has only been worn once (the day of these photos) and the russet one twice. They are both in perfect condition and like new. Anyone interested? They are lightweight, so sending internationally wouldn't be a problem either.

10 comments:
Thanks so much for sharing this! I'll probably put it to good use in the near future. Your bonnets turned out amazing.
Hi Hanna,
Thanks! A photo tutorial like this would have been so useful when I made mine, so I thought a few people might enjoy it.
Just a note on the bonnet pattern - I used the medium size in the pattern but would definitely use the smaller size when I make another. I don't take a large size in a hat (about 6 7/8 old sizing). Now I've had my hair cut shorter and I don't have a big bun of hair at the back, the bonnets are a bit too big for me. I'll have to make a lacy cap to wear inside them, just to bulk them out a bit and stop them slipping back!
Thank you Susan. Someone pointed me to this and I found it excellent for making the bonnet I wore recently on a musical version of A Christmas Carol. Although I didn't have the original pattern I was able to make a reasonably close copy and was really pleased with it. The first time I wore it I found it kept slipping off of the back of my head and so I attached a small hair comb to the inside ans this did the trick. thanks again for posting.
This is the first tutorial I can actually follow without getting lost halfway through - thank you! Which pattern did you use? I'd like to get one. It will be my first attempt, but you make me feel as though I can do it!
Hi Ayshah,
I used the Simplicity pattern - bought online on ebay. It does come out a bit bigger than I expected. Next time I make one, I am going to use the small size, rather than the medium pattern, although I could pad out the inside of the medium one with a lace cap.
Hi Susan,
Just thought that I would pop in to say 'hello' to you both.
I'm revamping my own 'how to make' site at the moment - but my hat is a slightly different design from yours. I started with an old hand-quilted bedspread that was in very poor condition. I'd already used part of it for a petticoat for the winter months.
See you around at a Victorian event.
regards
frances T
Hi Frances,
Nice to hear from you - what is the address for your new website?
Do stay in touch. I do stuff like Facebook too.
Best wishes
Susan
Man. The kind of things you find when googling.
Definitely will give this a go, if I can get my hands on some of the wire stuff.
I should have added a link to the eBay seller where I tracked down the wire -
http://stores.ebay.co.uk/White-Rabbit-Costume-Supply/Millinery-Supplies-Pattern-/_i.html?_fsub=4&_sid=47612337&_trksid=p4634.c0.m322
Hope that helps!
Its so useful seeing the construction of the bonnet in bit size stages. I've looked at a few blogs and photo's of stages get skipped. I think I've finally found some buckram (in UK) I can use.
Post a Comment